Guidance for Launching a Simple E-commerce Website with WordPress on AWS
Summary: Launch a simple website on AWS in minutes with e-commerce and analytics capabilities, without having to delve into complex coding or configuration.
Launch a simple website on AWS in minutes with e-commerce and analytics capabilities, without having to delve into complex coding or configuration. Small- and medium-sized businesses (SMBs) can use this Guidance Implementation Guide to quickly deploy a website with WordPress for website content management, WooCommerce for e-commerce capabilities, and WordPress Statistics (WP Statistics) to monitor your site analytics. With this Guidance, you can launch a secure website and manage your design and content. The website is deployed on Amazon Lightsail, which gives you standard, predictable pricing per month.
Benefits
By using this Guidance, you will gain the following benefits:
Quickly launch e-commerce websites: Launch e-commerce websites quickly, and manage them using intuitive plug-ins like WordPress and WooCommerce.
Auto setup and configuration: The setup of the website instance, security, login, and plug-ins are all handled automatically, without any manual technical work.
Predicable monthly pricing: This solution is deployed on Lightsail and provides low, monthly, predictable pricing.
Architecture diagram Figure 1 shows the diagram for this Guidance.

Figure 1: Diagram for Launching a Simple E-Commerce Website with WordPress on AWS
Architecture workflow
Access the AWS CloudFormation template here and deploy it in your AWS Console here. The template will handle all of the setup and access and provide you with a URL to access your new website. The CloudFormation was tested in US-East-1 AWS Region, and the guidance can be used only in US-East-1 based on Lightsail distribution availability. For more details, see AWS::Lightsail::Distribution in the AWS CloudFormation User Guide.
Before launching the CloudFormation template, create your Admin user name and Admin password and store it in AWS Secrets Manager here. The name of the secret should be WordpressAdminCredentials. The two keys for username and password should be name AdminUsername and AdminPassword, respectively.
The website is created utilizing LightSail’s instance and is initialized with standard configurations such as Linux OS, the latest version of WordPress, and other plug-ins to enable e-commerce and analytics.
a. Your website instance on AWS is priced at a standard $5 USD/month, with 1GB of RAM, 1 virtual CPU, 40 GB of storage, and 2 TB of data transfer. These costs do not account for any additional WordPress plug-ins you may install.
b. Once the instance is created, you are responsible for managing the installed plug-ins like WordPress, WooCommerce, Elementor, and WP Statistics.
An Amazon CloudFront distribution is automatically created within Lightsail, which accelerates delivery of your website content and assets globally and provides distributed-denial-of-service (DDoS) protection.
Once the CloudFormation Template has created the stack, you can find the URL of your website in the Outputs section of the CloudFormation console.
a. In the Output tab in the CloudFormation Stack, open the DistributionDetails URL in a new tab. See Figure 2 for an example screenshot of where to find your URL.
b. Click the Default domain link shown in the distribution. Example link: https://d1gb5spb######.cloudfront.net/
c. Append wp-login.php to the URL of the Default domain link: Example link: https://d1gb5spb######.cloudfront.net/wp-login.php
d. Log in using the username and password from Secrets Manager.
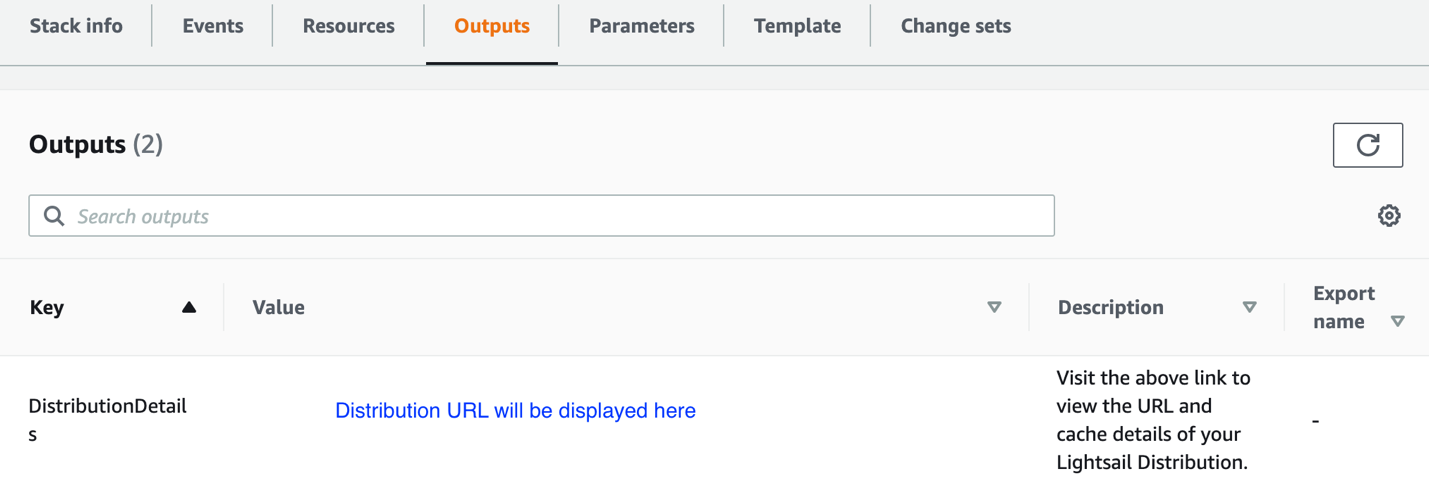
Figure 2: Screenshot of Outputs Tab Hosting the URL
e. Your website will have the following plug-ins enabled so you can customize your website:
I. WordPress plug-in to create your website using various themes
II. WooCommerce plug-in to create your online e-commerce store
III. Elementor plug-in to provide you more control over customizing your website layout and formatting
IV. WP Statistics plug-in that provides insights on website analytics, so you can track visits to your new website
Your website instance is now created, and you can log in to the website with your username and password, that you provided in Step 2. a. Log in to your website using the WordPress Login URL. For example, if your website is www.example.com, you can log in at www.example.com/wp-login.php. You simply need to append “/wp-login.php” to the end of your URL or domain name.
You can also register a new domain and transfer it to AWS in order to access your website through a domain name.
a. To use your own domain name, register your domain name and ensure the domain is active.
I. Log in to the LightSail console, and access the Domains and DNS section from the main Lightsail page.
II. Create a new Domain Name System (DNS) Zone, as shown in the screenshot in Figure 3.
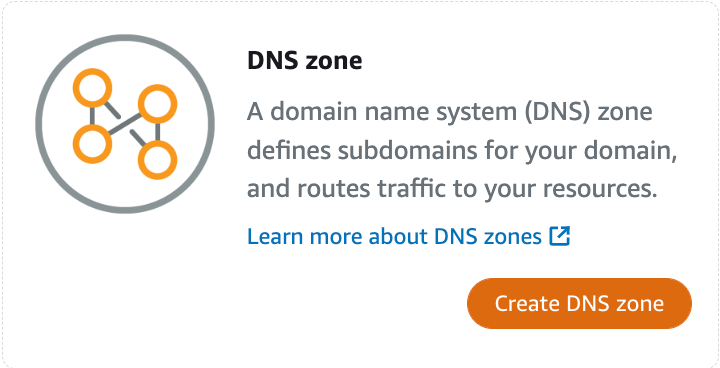
Figure 3: Screenshot of “Create DNS zone” function.
- Enter the domain you have registered, and select Create DNS Zone.
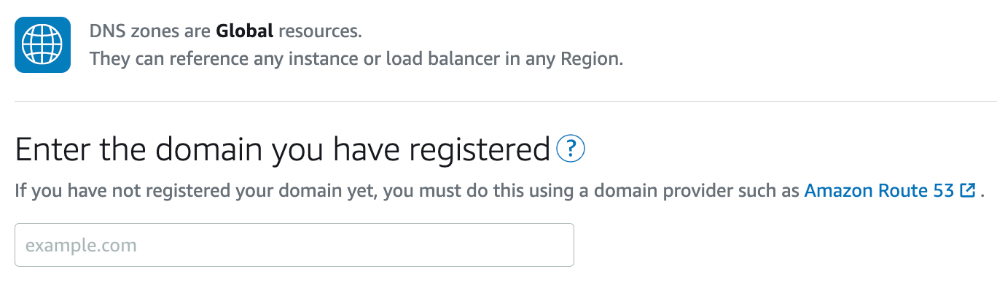
Figure 4: Screenshot of Domain Registration
- Go to the Hosting provider where you registered the domain (if outside of AWS), and create CNAME records provided after you select “Create DNS Zone”.
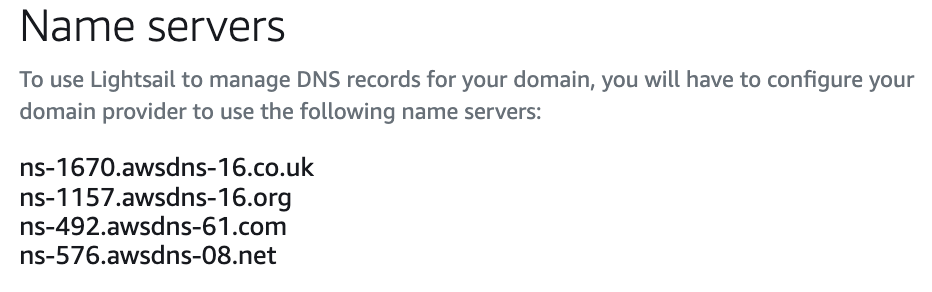
Figure 5: Screenshot of CNAME Records
a) For example, if you are using an external hosting provider, you can create CNAME records as shown in Figure 6, to ensure the domain is redirected to your existing website.
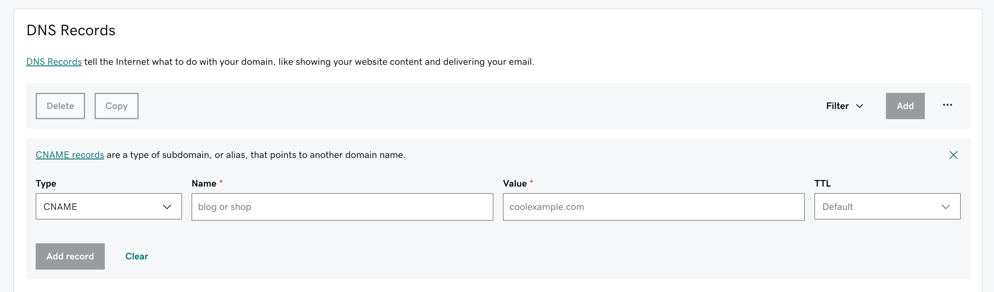
Figure 6: Screenshot Showing How to Create CNAME Records
b) For more information, refer to the webpage: Creating a DNS zone to manage your domain’s DNS records in Lightsail.
- Check and verify that website traffic is routing correctly to your Lightsail instance.